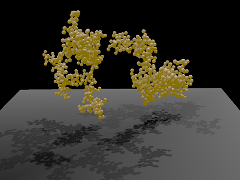
Zindaiji 3 is a visualization application for particle simulation data.
Zindaiji is named after a location name near NAOJ mitaka campus.
The aim of Zindaiji 3 is
Zindaiji 3 uses OpenGL and its Shader Language. PCs with fast graphic board are recommended. Old PCs with OpenGL version 1.5 or before would not work.
|
2012/01/15 ver0.30 |
2012/04/22 ver0.47 |
2012/08/06 ver0.60 |
Decompress the downloaded file and set the entire folder to any folder under your control. Since some configure files are saved at the folder with the executable files, please do not set them to a folder where you have limited permittions, such as system folder.
Zindaiji 3 does not touch the registry, so that you can uninstall by simply removing the folder.
Linux version requires installation of wxWidget-gtk. In ubuntu, wxWidget-gtk can be installed via synaptic.
Currently, only 32 bit version exists for MacOS X. In Mac OS X version, you must execute ./Zindaiji3Mac.app/Contents/MacOS/Zindaiji3Mac in command line from terminal at the appropriate directory.
(I'm just a new comer to Mac world, and I don't know how to make it executable by double clicking...
It seems that wxWidgets 2.9 supports Mac OS X 64bit version. I must upgrade wxWidgets in near future...)
Since Zindaiji 3 is on the first stage of the developping, I expect many bugs are hidden in it.
If you are kind enough, you can report them in my blog, though it is written in Japanese...
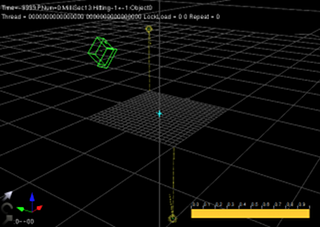
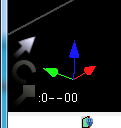
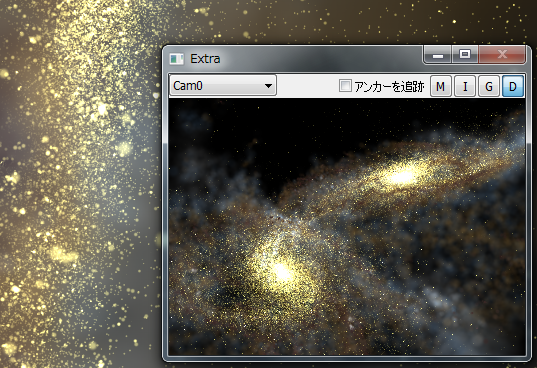
The largest panel in default state is the preview panel, where the visualized images are shown.
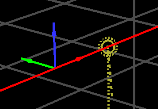
By default a grid, a camera, light sources, and a pivot (sky blue cross mark) are shown.
In Zindaiji, you can rotate the scene as you are rolling "trackball". Rotation is assigned to left button of the mouse by default. The center of the rotation is the pivot.
Also, zooming is assigned to middle button and mouse wheel.
For a mouse without middle button, Alt + left mouse button works as if it were middle mouse button.
Panning is assigned to Shift+Ctrl+left mouse button. Note that when the preview panel is panned, the center of the rotation (pivot) also moves.
 Panning moves the location of the pivot.
You can select and/or move items (camera and lightsources) in Preview Panel.
In default, selection is attributed to Shift+right mouse button, and moving selected item is attributed to Shift+left mouse button.
In bottom-left corner, there are buttons for translate, rotate and scaling. Shortcut key 'T', 'R' and 'S' are assined respectively.
When an item is selected, guide arrows/rings are displayed. By directly dragging them with Shift+left mouse button, you can move it along x/y/z axis.
In translation mode, you can move the item along the plane perpendicular to the view when dragging elsewhere.
You can use short cut key "X", "Y", and "Z" to set the move mode along x/y/z axis.
You can configure the mouse setting in Preference Dialog.
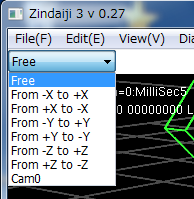
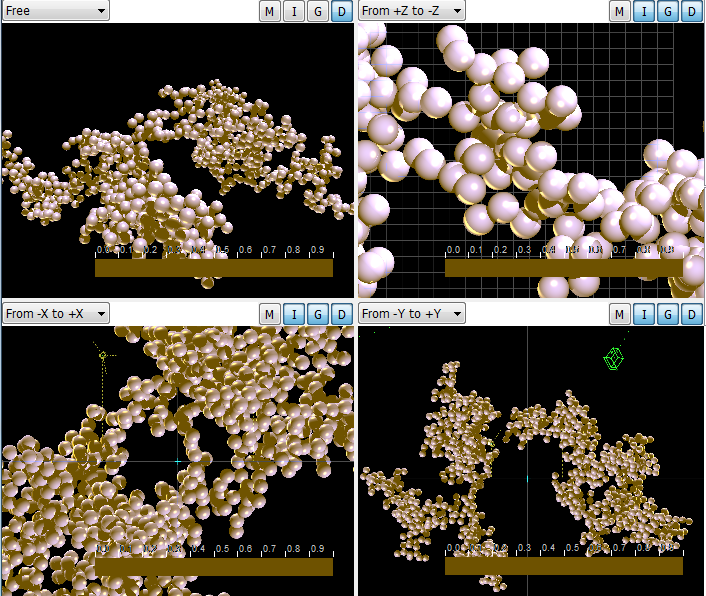
The pull-down at top-left corner is a selector for the point of view.
"Free" view is default one, which you can navigate as described above.
"Cam0" is a view connected to the camera path. When you change the frames for timeline, the point of view automatically follows the camera path.
Other modes are orthographical view alog the line of axis.
These views can be selected by short cut keys 0(Free), 1, 3, 7, and ctrl-1, ctrl-3, ctrl-7.

Open or save a project file. The extention of the project file is .zjp
To load particle data, this menu opens a Data Loader Dialog.
Save a image shown on the screen. When multiple panels are displayed, image on the top-left panel would be saved. To save image sequence, this menu opens a Save Image Sequence Dialog.
Snapshot image is simply captured from the panel, so that the image size is automatically given.
If you want to get images with arbitray size (upto 4096), save image using Save Image Sequence Dialog.
Export data or other informations. Currently particle data exportion is implemented.
With export, can convert data from Ascii format to Binary format, for faster loading in future use.
You can configure the format by Data Exporter Dialog.
Closes the scene.
Quit Zindaiji 3
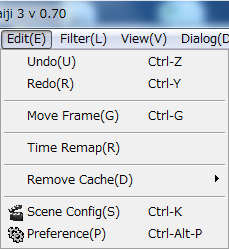
Undo and Redo.
Change the current frame numerically. Also, You can set the current frame numerically by text controls at Timeline Editor.
Toggle Time Remap mode. Time Remap controls the time of data sequence as a parameter.
Release the memory used for particle data.
To configure the parameters such as total length of the scene, open a Scene Dialog.
Open a Preference Dialog. The dialog provides the way to edit the parameter such as mouse configure etc.
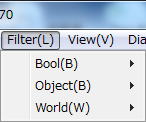
Filters do some manipulations to the data. You can apply multiple filters.
Detailed parameters of filters would be shown on Filter Panel.
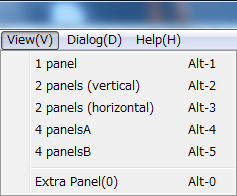
Zindaiji can show multiple preview panels up to 4. This menu set the number of the preview panel.
Extra panel is a window with a single preview panel, which floats over the main window.
The panel can be maximized by "Alt+Enter". Thus, if the scene is not so heavy, you can play the scene with "SPACE" key in full screen mode.
If you do so, hiding data in main window would improve the performance.
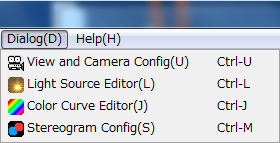
Open a View And Camera Config Dialog. The dialog provides the way to configure the setting about view and camera path.
Open a Light Source Editor. In Zindaiji3, you can set up to 7 light sources.
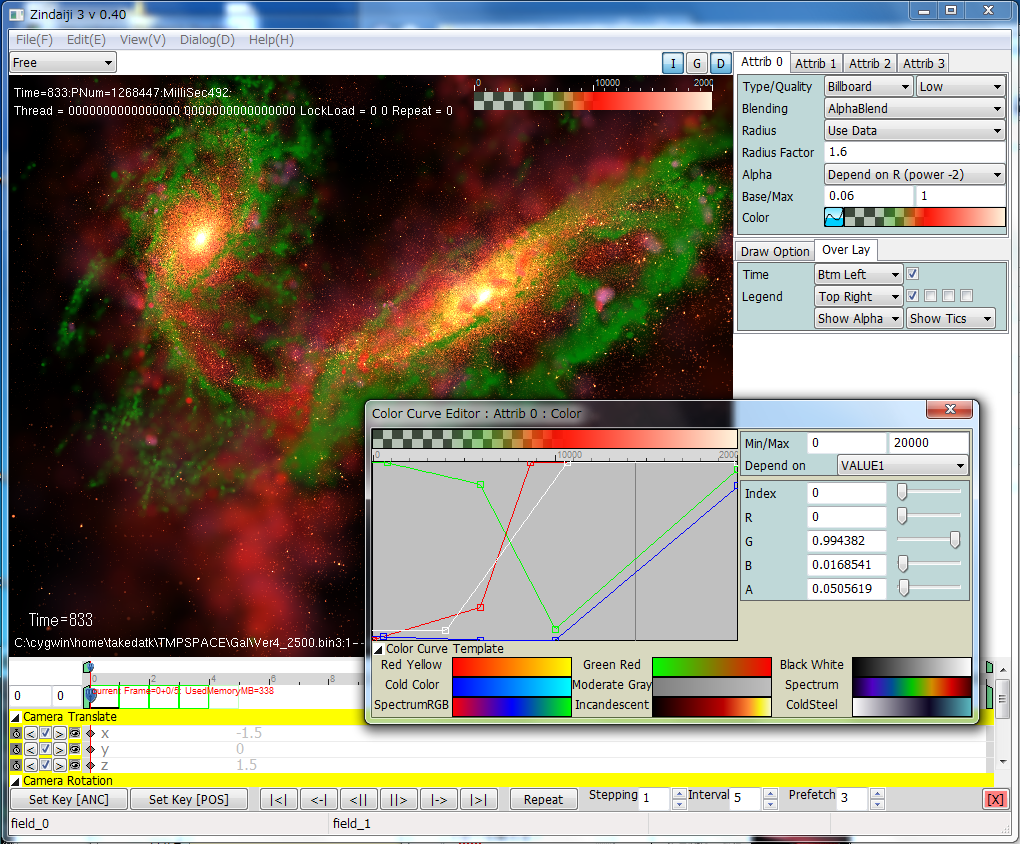
Open a Color Curve Editor.
Open a Stereogram Config Dialog.
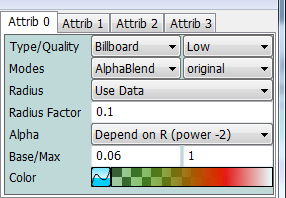
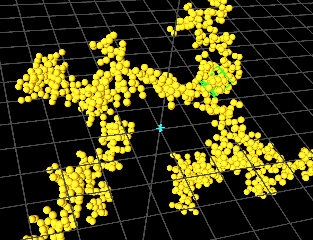
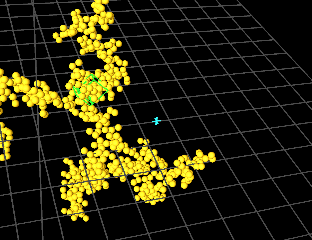
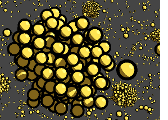
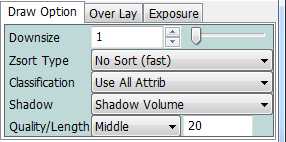
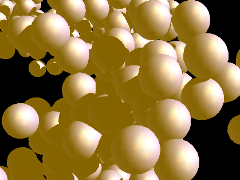
Zindaiji draws particles as one of the following.
Quality parameter determines the number of polygons in drawing a sphere.
Choose the modes for rendering objects.
In AlphaBlending mode, a translucent particles (partially) hide the colors behind. This is good for a situation such that a gas cloud hide the light from the stars behind.
In Additive mode, a color of particles are just added to the canvas. This is good to show simple density distribution, or some light-emitting particles like stars.
Also, you can select a shader by the right hand side combobox. This function is valid only for displaying spheres.
"Original" uses is default openGL rendering pipeline.
Note that the location of highlight is calculated approximately, so that this mode is not good for fish-eye rendering.
 In "Gouroud" mode, the color is calculated at each vertex of polygons, like original pipeline. The rule for coloring is somewhat different. Note that a "star" appears at the border of polygons.
In "Phong" mode, the color is calculated for each pixels, so that the seam between polygons disappers.
 You can render a image like illustration with "Toon" shader.
This is experimantal feature and valid only for constant color material for now.
This parameter determine the opacity of the particles.
Alpha 0 means entirely transparent object.
If this parameter is set to constant, all particles has the same opacity determined by the Alpha Factor.
When this is set Depend on R (power -2), the opacity depends on particle radius square inversely.
This is good to represent SPH simulations, because the density depends on R-3, while the length of the light path which travel through the particle depends on R, the absorotion of the light roughtly depends on R-2.
In this case, Opacity is set to Max[Amax, (R/Rbase)2], where Rbase and Amax are set at Base/Max line.

Setting a color of particles (sphere).
Three colors are ambient, diffuse, and specular colors respectively.
Ambient color is a color which can be seen even at the opposite side of the light source.
At the near side to the light source, diffuse and specular color are added to the ambient color according to the angles between the sphere, light source, and the camera.
Material color is also able to be edited by Color Curve Editor.
When drawing translucent objects, one must draw from far objects to the near objects sequentially, because the apparent color of nearer objects depend on the color of the distant objects. This option determine whether to do the z sort. If you do not use translucent, or draw objects in additive mode, you can omit the z-sort process.
When multiple types of particles exists, changing openGL status from one fitted to a particles to another one fitted to another particle takes large time.
When this option is set to "Use Attrib0 Only", Zindaiji displays all particles as Type0, and omit most of status changing process of OpenGL, making the drawaing considerably fast.
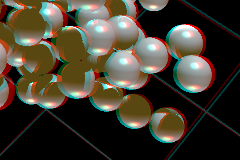
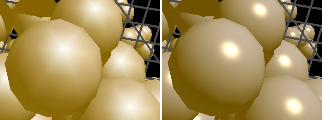
Using shadow volume method, you can render with shadow for sphere particles.
Shadowing greatly improve the reality of the scene, while it considerably lengthen the rendering time.
The speed of the rendering depends on the number and total area of "shadow polygons".
Smaller values for length makes rendering faster, but it should not smaller than the scale of the target objects.
By choosing "Show Shadow" mode, the shadow polygons are displayed explicitly.
You can turning on and off shadowing for individual light in Light Source Editor.
These parameters determine the quality and length of the shadow polygon.
In the terms of rendering speed, length value should be as small as possible.
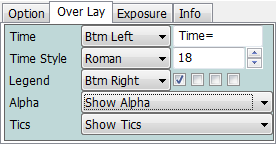
You can display time and color curve infor mation as legends on preview panel. The position of them can be selected by pull down menu.
You can edit prefix strings and fontstle and size by Time and Time Style pull down menus.
The four check-boxies represents color curve from attribute 0 to attribute 3.
Alpha components are represented by background checker-board pattern. Simple color cuver without transparency information can be selectable. (Select "Hide Alpha" on pull down menu.)
You can show or hide tics on the color curve.
*Known problem* number on the tics may be trimmed. This should be remended in future.
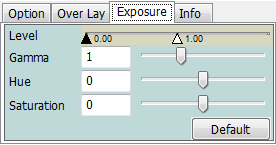
Zindaiji3 uses 16bit FBO Objects for rendering, so that the image in the memory has more information than the image shown on the 8bit image on the monitor.
Level and gamma parameters determine how 16bit FBO images are mapped to the 8bit image.
Note that only 8bit image saving is supported in current Zindaiji 3.
You can also adjust the color of the image on the monitor with Hue and Saturation sliders.
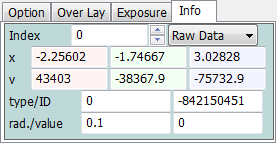
You can see the particle information in Info tab. This is especially useful when checking whether your data is correctly loaded.
Parameters of filters are shown in Filter Panel. Multiple filters can be shown in the panel sequentially. By clicking the topmost button of each filter, you can collapse of expand each panel.
Several Filteres would be implemented and they would classified to Boolean, Objects, or some other categolies.
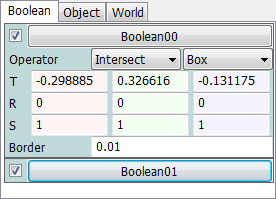
T, R, S in the panel represents Translate, Rotate, and Scale.
Boolean Filter screens out particles out of some defined regions. You can display cross-sectional view using these filters.
Filtering Filter screens out particles according to its index. It would be helpful for seeing some limited number of particles.
Databox Filter moves, rotates, or scales the coordinate system of the data.
We expect this filter make it much easier to make a scene with a rotating data, instead of making camera circulate around the data.
Object Filter sets primitive objects to the scene. We also intend to implemet to import wavefront object. Please wait some times.
Grid Filter sets coordinate grid to the scene.
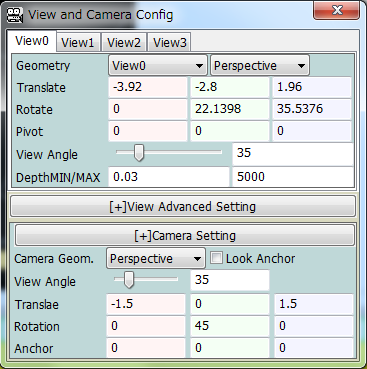
View 0-3 corresponds to the 4 Prview Panels respectively. Translate and Rotate in View Settings represents the position and Euler rotation angle of the very point of view which is used to display the preview panel.
On the other hand, those in Camera Setting represent the position and angle of the camera at current frame in the camera path.
You can edit the camerapath with Timeline Editor. When you set the display mode as Cam0, the view automatically follows the camerapath.
The check box "Look Anchor" determines whether to force the camera to track the anchor point, which is initially set at the origin.
This mode works well when you want to follow the some moving phenomena in the data, thoush you must handle the anchor by hands.
(Import of parameters from some text file is a good idea. It would be implemented in future).
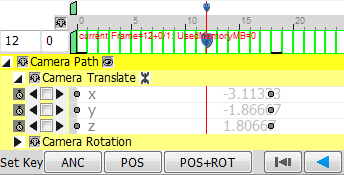
Three "Se Key" buttons at the left-bottom corner have important function for camerapath editing.
"POS" sets a keyframe to the camerapath at the current position of the view.
"POS+ROT" sets keyframes on both position and rotation.
In many cases, what you have to do is just determine the best layout on preview window, and just press the buttons.
Perhaps, using "POS+ROT" button is better for editting a fly-through path, while using "POS" button is good for editting a path looking around the anchor with "Look Anchor" checking.
"Anc" sets a keyframe to the position of the anchor. In this case, the position of the "pivot" is copied to the position of the anchor.
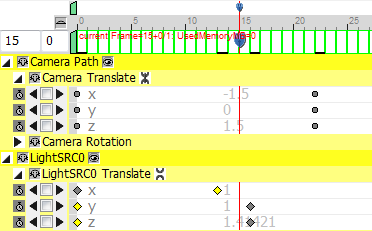
The red line represents the current frame. You can control current frame and range of working area using the sliders.
With text control boxes at the left of main slider, you can set current frame numerically.
Green boxes represent frames that the data is already stored on the memory.

At the default, time dependency is set to be OFF, and the parameter is constant at all frames.
To toggle time dependency to be ON, click  icon.
icon.
Time dependent paramers can be edited in the timeline editor.
You can set keyframes in the timeline, and parameters are automatically interpolated between keyframes.
Insert and removal of keyframes can be done from right mouse button menu, or check box at the left side.
For multidimentional parameters, such as 3-dimentional positions, each components can be edited separately.
Toggle "Link" button  to edit parameters individually.
Also, you can edit the key frame numerically by calling input dialog, by double clicking on the key, or from right mouse button menu.
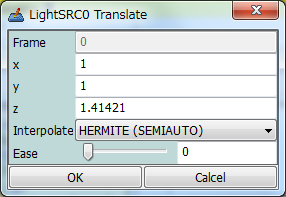
Following types of interpolations are implemented.
STEP, LINEAR, HERMITE(AUTO), and HERMITE(SEMIAUTO).
In HERMITE(AUTO) mode, the parameters are interpolated using cubic function. The velocity at the key frame is automatically calculated using previous and next keyframes.
In HERMITE(SEMIAUTO) mode, you can set the "Ease" parameter, which is multiplied to the velocity at the key frame.
When this parameter is setted to 0, the parameter gradually approaches to the key value with decreasing velocity, which goes to 0 at the time of key frame.
This feature allows you to make motion with ease-in and ease-out effects.
You can hide unnecessary paramters from TIMELINE EDITOR using shy button  .
When Kilroy mark on the each parameter and global Kilroy mark on the upper left are both ON (i.e. Mr. Kilroy is hiding), the marked parameters will be hidden.
.
When Kilroy mark on the each parameter and global Kilroy mark on the upper left are both ON (i.e. Mr. Kilroy is hiding), the marked parameters will be hidden.
If you want to reappear them, turn global Kilroy mark OFF.
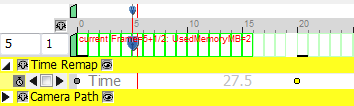
If Time Remap mode is turned on by Edit(&E) menu, you can control the time as one of parameters.
*note* This is an experimental feature, and some bugs exist in preload and memory release algorithm.
Eample).
Assuming you have data sequence with 100 files.
If you want the scene wait 50 frames at the initial and final state, set the length of the scene to 200, and set keyframes of time remap 0 at 0 frame, 0 at 50 frame, 99 at 149 frame and 99 at 199 frame.

The buttons at the bottom control the time.
I think you can understand the meaning of the buttons.
By setting stepping parameter larger than 1, the frames would be omit in animation.
With stepping 2, frame 0, 2, 4, 6, .... would be displayed.
This works well when editing scenes with large data where loading and displaying takes seconds.
Intervals represents interpolation steps between frames. For example, when setting interval 5 in a scene with 10 timestep data, total 50 pictures would be saved when exporting image sequences.
The data between each time step would be interpolated according to the rule that was setted in the Data Loader Dialog.
Prefetch determines the ranges for data prefetch.
If you set the prefetch 3, data would be loaded in advence up to 3 frames ahead of the current frame.
The prefetch loading is done by another thread(s), so that the fall in the performance is small.
With proper settings, prefetch can be much help for reduction of the waiting time in editing or rendering.