Tutorial: Let's Start
Let's explore the Universe as revealed to us by the latest discoveries in astronomy!
This tutorial will show you how to install the software and
how to use it to visit various objects in the Universe.
For details, please read the manual (mitaka_manual_E.pdf).
Install
Decompress the .zip file in any folder.
Launch
Double click "mitaka.exe" and wait until all the astronomical data are loaded.
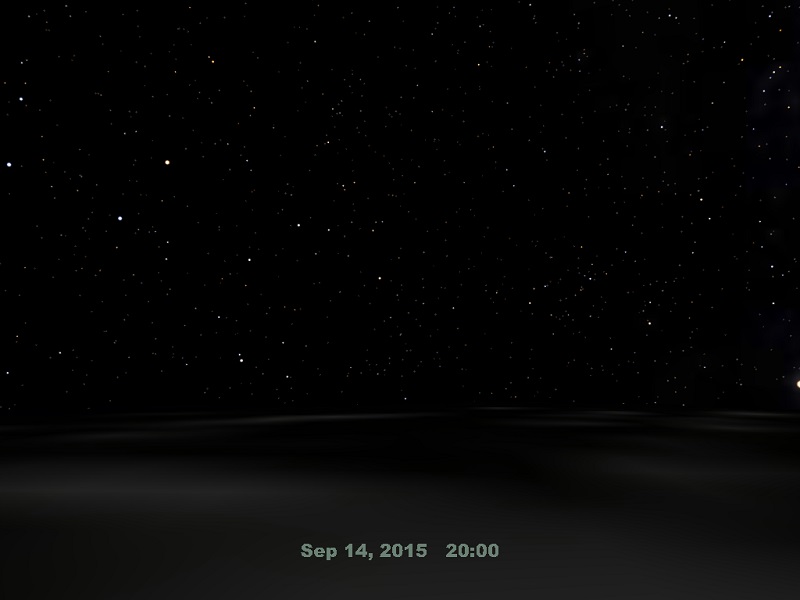
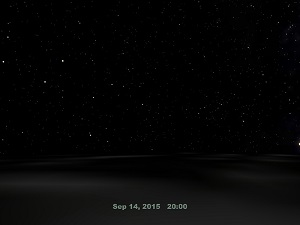
Sky as seen from the Earth (planetarium mode)
In planetarium mode, Mitaka shows the sky as seen from a particular location on a planet.
When Mitaka starts up, it shows the night sky in Mitaka, Tokyo, Japan, at 8PM of the current day.
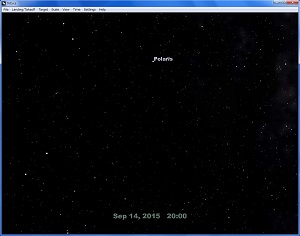 |
| The night sky is displayed. (Click image to enlarge.) |
To move the view point in Mitaka, hold down the left mouse button while dragging your mouse across the sky,
or using the arrow keys. Push the right mouse button while dragging your mouse, or use your mouse wheel,
to change the viewing angle.
Pushing the "A" key displays/hides the star and constellation labels, including constellation lines.
Changing the time
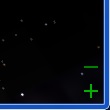
Bring the mouse cursor to the upper-right corner of the Mitaka window.
Buttons labeled "+" and "-" will appear.
These buttons will disappear if you move the cursor away from the upper-right corner.
 |
| Buttons for time handling. |
When you click and hold the "+" button,
time advances and the starry sky exhibits diurnal motion.
If you continue holding it, you can see the morning come with the Sun rising in the east.
You can also run the time backward and forward with the "3" and "4" keys.
The time increment is initially set to 10 minutes.
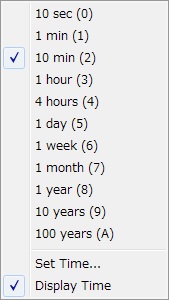
If you click either "+" or "-" with the right mouse button,
a pop-up menu will appear that will allow you to change the time increments
from 1 second to 100 years.
 |
| Pop-up menu for time handling. |
You can also set the time directly
by selecting "Set Time..." in this menu.
Taking off (space mode)
Take off from the Earth and begin exploring outer space by selecting "Landing/Take Off" - "Landing/Take Off"
from the menu bar, by pressing the "S" key, or by pressing the mouse wheel.
Once you take off, you are floating in space several kilometers above Mitaka, Tokyo
facing the same direction as you were in planetarium mode.
You see the dim surface of the Earth at the bottom of the window.
 |
| Just after takeoff |
You can rise up into space by zooming out when you are near the ground.
You can zoom out by using one of the following procedures.
(The opposite of each option is used to zoom in.)
- Move the mouse upward while pressing the right button.
- Rotate the wheel of the mouse towards you.
- Push the "PAGE DOWN" key.
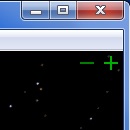
- Use the zoom out ("+") button that appear in the lower right corner of the window.
 |
| Zoom in ("-") and zoom out ("+") buttons |
Keep zooming out until you can see the whole Earth against a background of stars.
If the clock is set to night-time,
you will see the night side of the Earth.
 |
| Earth's night side |
You can bring different parts of the Earth into view by dragging the mouse
with the left button down or using the arrow keys.
Double clicking on any point on the Earth will move it to the center.
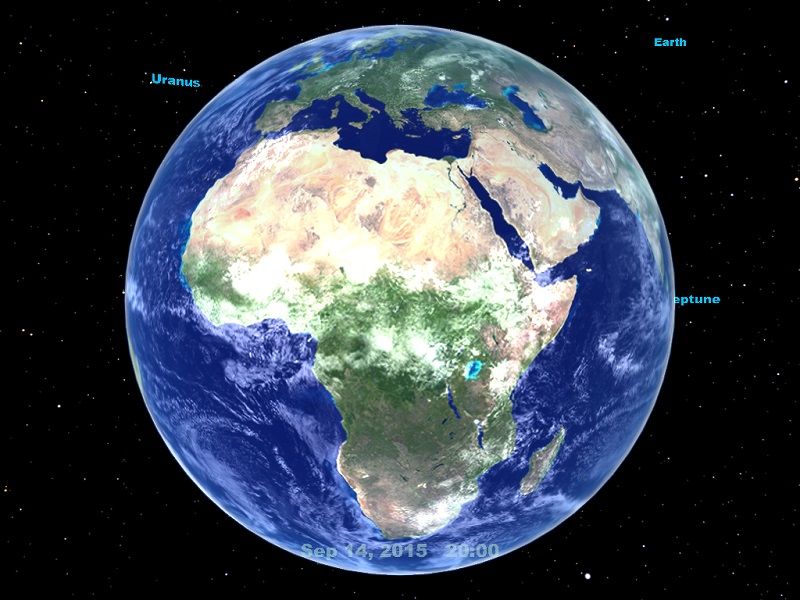
Let's move to the day side of the Earth.
 |
| Earth's day side |
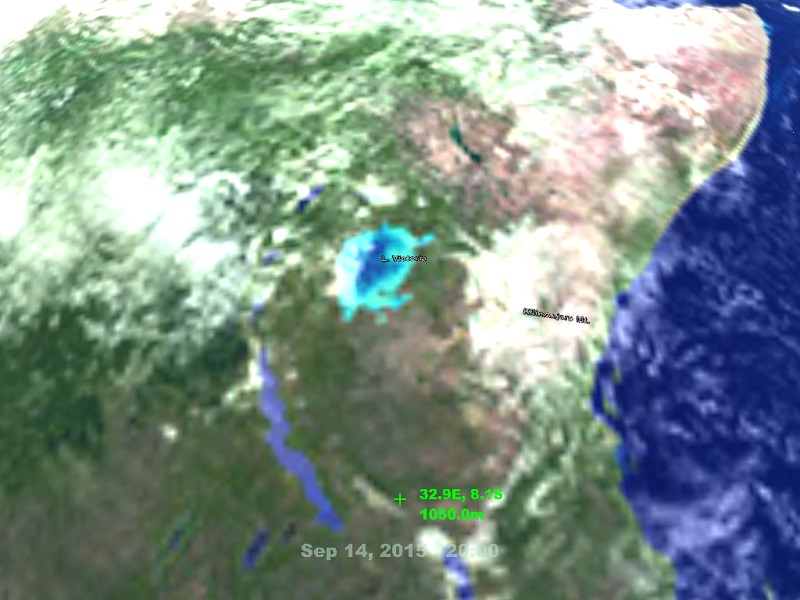
Zoom back towards the Earth using the "-" button or the "PAGE UP" key until a green "+" sign appears on the surface.
 |
 |
| The green pointer indicating location on the surface |
Approaching the ground |
You can land on the indicated location by selecting "Landing/Take Off" from the menu bar,
pressing the "S" key, or pressing the mouse wheel.
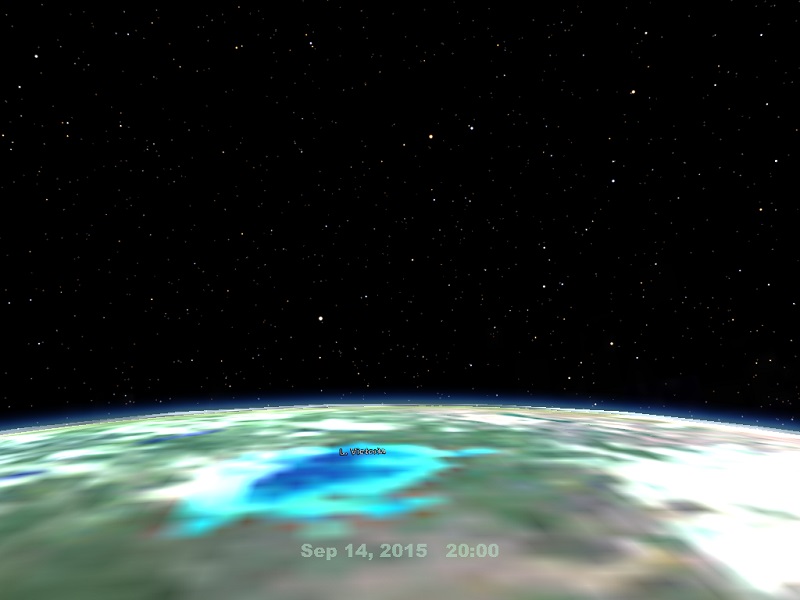
If you land on the Earth's day side, you will see a blue sky.
If you move the time forward to night, you can see the starry sky at that location.
To continue with the tutorial, take off and zoom out again so you can see the whole Earth.
If you advance the time forward, you can see that the Earth rotates once every 24 hours.
Exploring the Solar System
Let's leave the Earth to explore the Solar System.
Click the zoom out button, rotate the mouse wheel, or pressing the "PAGE DOWN" key to move farther and farther away from the Earth.
The Earth becomes smaller and smaller. For a while, you will only see stars in the background.
The distances between the planets are much larger than the size of the planets.
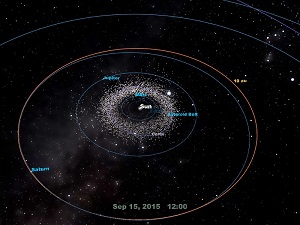
Eventually you will begin to see other objects in our Solar System: planets and asteroids.
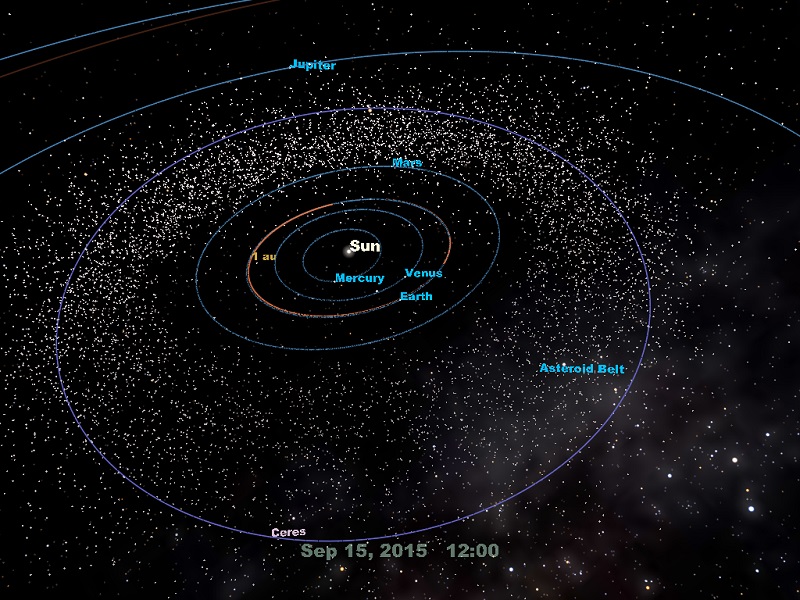
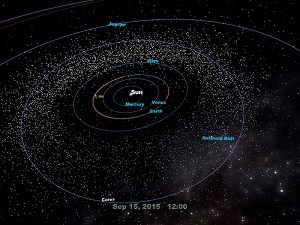 |
| The inner Solar System |
The blue lines show the orbits of the planets.
Red circles indicate distances from the Sun.
We call these "Scale Circles."
These help us understand the size of the structures we are looking at.
The units we use for scale are:
| Units | Description |
|---|
| Astronomical Unit (au) |
The average distance between the Earth and the Sun.
1 au is equal to approximately 150 million kilometers. |
| Light-years (ly) |
The distance that light travels in a year.
One ly is equal to approximately 9.5 trillion kilometers, or 63 thousand au. |
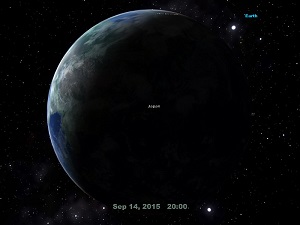
So far we have remained centered on the Earth.
Other objects can be placed at the center of the view by selecting them as a target.
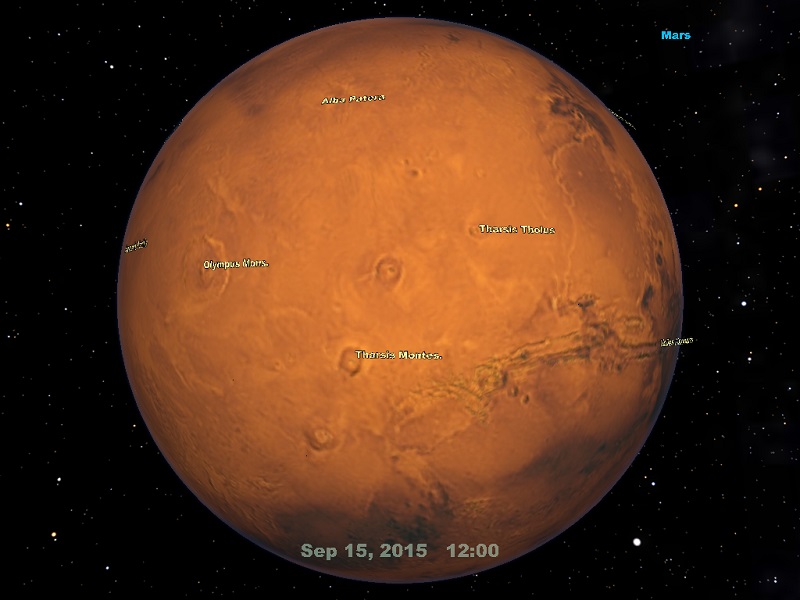
Let's choose Mars as our next target.
When Mars is in the view,
move the mouse cursor onto Mars or its label.
The label will turn green and immediately display information about Mars.
(When you point another object or its label, you see the information for that object.)
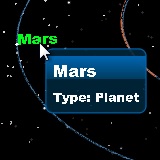 |
| Pointing on Mars' label |
To make Mars your target, double-click it or its label.
You can also choose Mars by selecting "Target"-"Solar System"-"Mars".
To move close to the target, select "Target"-"Move to the target" from the menu, or press the "T" key.
Now Mars is fixed at the center of the view
and you can zoom in and out and land and take off from Mars just as we did from the Earth.
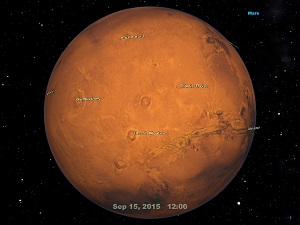 |
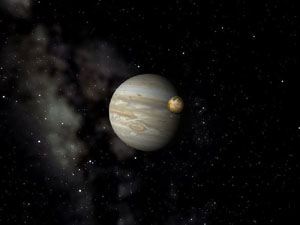
| Mars |
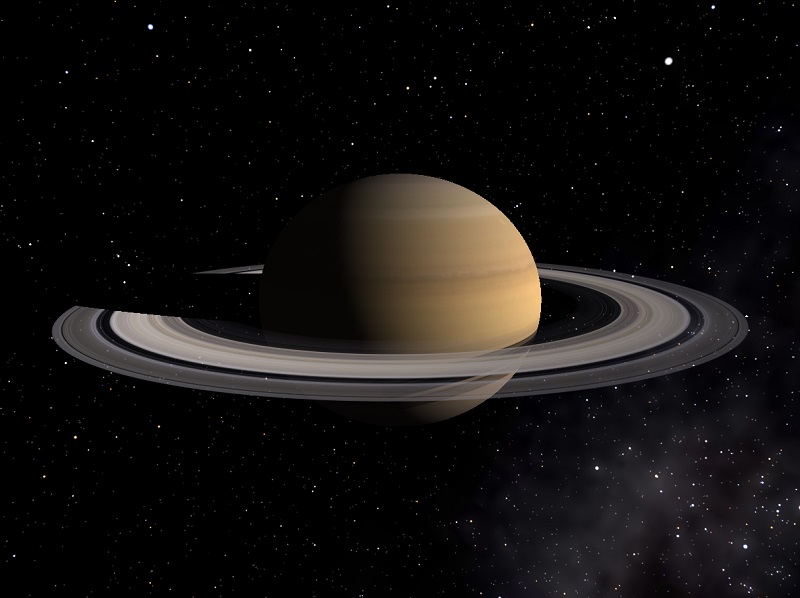
You can explore other planets such as Jupiter and Saturn in the same way.
 |
 |
| Jupiter |
Saturn |
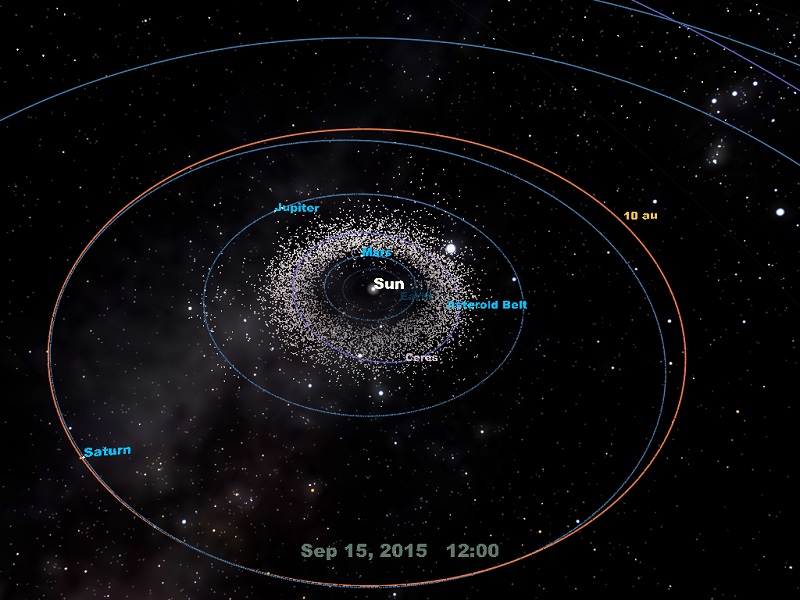
To explore the outer reaches of the Solar System, keep zooming out from any planet.
 |
| Orbits of Jupiter and Saturn |
The planets are so small compared to the orbit sizes
that you cannot see their shapes while their names are displayed.
If you miss the planets, you can enlarge them
by selecting "View" - "Planets" - "Magnification Rate" in the menu bar.
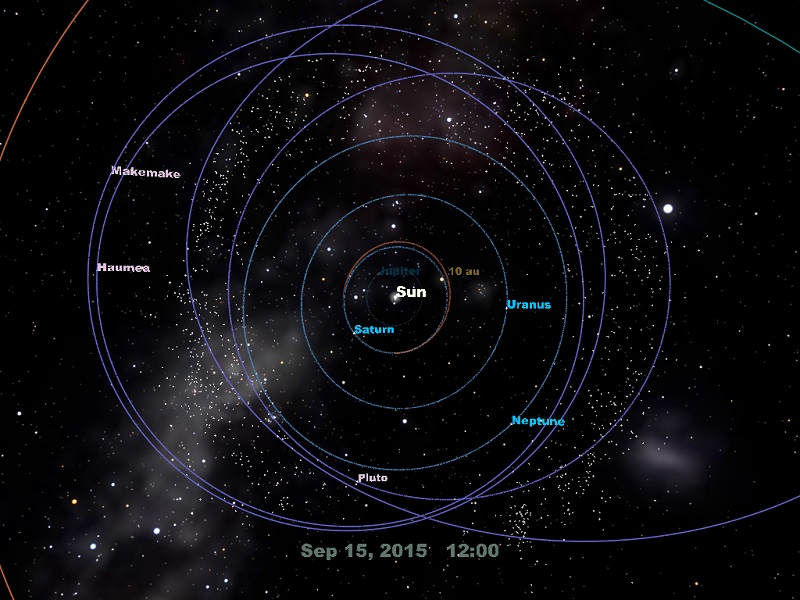
If you continue to zoom out, you can see the orbits of Uranus and Neptune.
These eight planets out to Neptune comprise all of the Solar System Planets under the current definition.
(The definition of a planet was reviewed at the General Assembly of the International Astronomical Union
in 2006; Pluto, which had previously been treated as a planet, was reclassified as a "dwarf planet.")
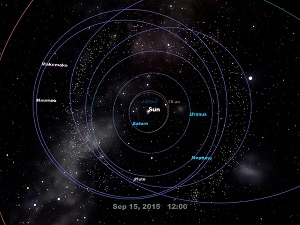 |
| Uranus, Neptune, Pluto, and Trans-Neptunian Objects |
In this window, you can see a group of small celestial bodies forming a ring a little beyond the orbit of Neptune.
These small bodies consist mainly of ice and are known as Trans-Neptunian Objects
(sometimes called the Kuiper Belt Objects).
Pluto is considered a typical representative of these objects.
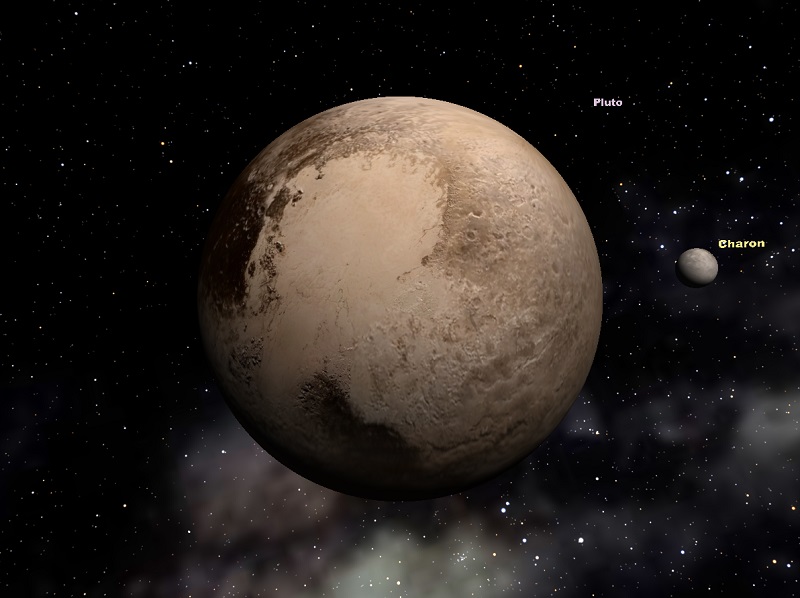
With a brief detour, you can also see Pluto, whose detailed surface has been just observed by the spacecraft New Horizons,
together with its satellite Charon.
 |
| Pluto and its satellite Charon |
Then, let's zoom out further!
 |
| Eris and Sedna |
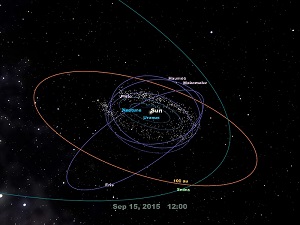
Far beyond the orbit of Pluto, you can see objects labeled Eris and Sedna.
These are large Trans-Neptunian Objects that were discovered recently.
They are believed to be mainly made of ice.
Eris is possibly a little larger than Pluto;
this triggered the revision of the definition of a planet.
Eris is believed to take about 560 years to orbit the Sun.
Sedna is a little smaller than Pluto and believed to take more than 10,000 years to orbit the Sun
in a highly elliptical orbit.
Sedna is about 90 au away from the Sun at present,
and it can be up to about 850 au away at the aphelion.
Set out to the limits of the observable Universe
Now it is time to leave the Solar System to set out to the edge of the known Universe.
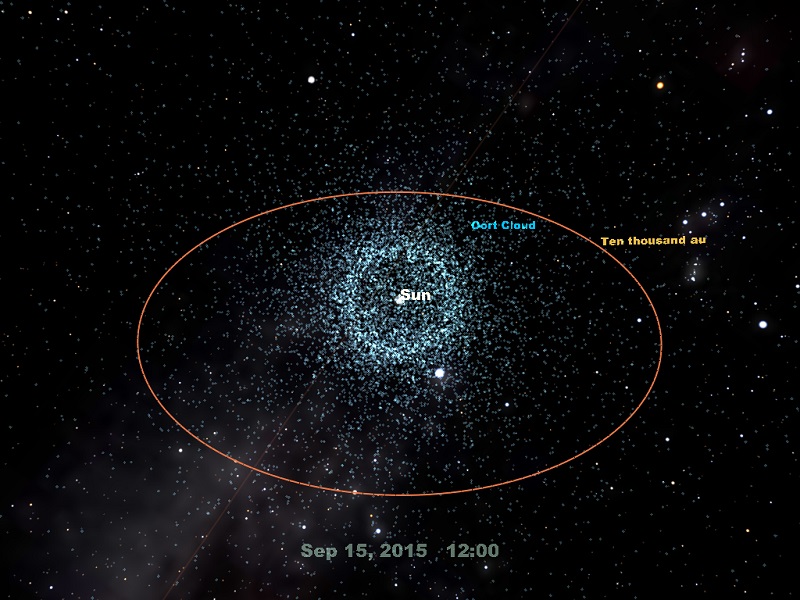
Keep zooming out farther and farther by pushing the zoom-out button, by using the mouse wheel, or by pressing the "PAGE DOWN" key.
As the orbits of the planets, Eris, and Sedna shrink and disappear,
the "Oort cloud" comes into view; this is the hypothetical home of comets.
(The Oort cloud has not been confirmed by observations so Mitaka displays a conceptual image.)
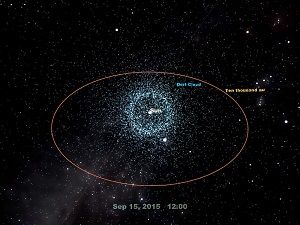 |
| The Oort cloud |
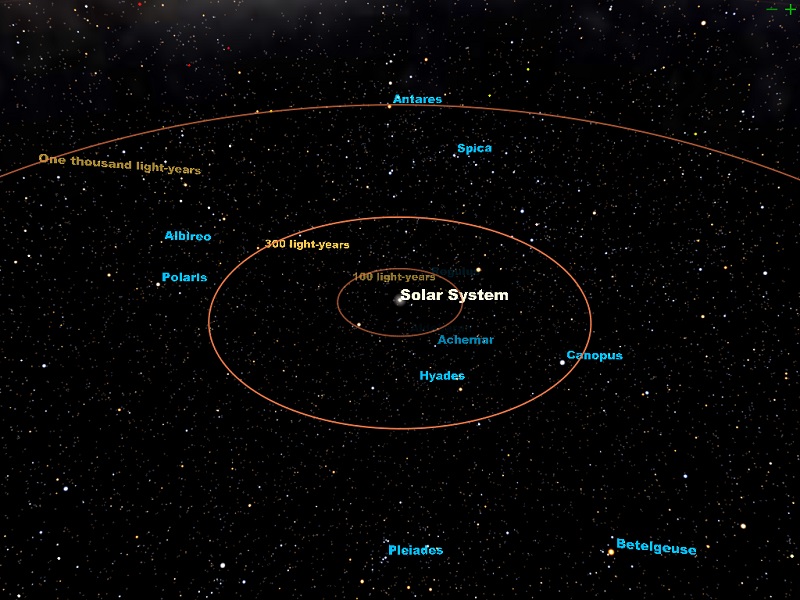
Then, you can see a world of stars spreading out beyond the 1 light-year circle.
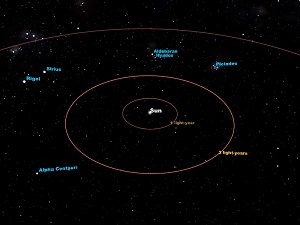 |
| Nearby stars |
In this window, you will see Alpha Centauri (the closest star to the Sun, about 4.3 ly away)
and Sirius (the brightest star as seen from the Earth, about 8.6 ly away).
Then, familiar stars making up the constellations will come into view as you travel farther and farther away.
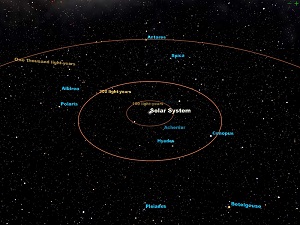 |
| Stars in the solar neighborhood |
The locations of these stars were determined through the measurements of the Hipparcos satellite.
However due to the limitations of the measurement accuracy, only the stars within about 3,000ly
are determined precisely.
Thus, only the stars within this range are available in this program;
however, this includes almost all the starts visible in the night sky.
If you continue to zoom out, you will see our Galaxy.
Since current observation have not yet been able to definitively determine the full structure of the Galaxy,
Mitaka displays a 3D model constructed from a combination of observations and theoretical predictions.
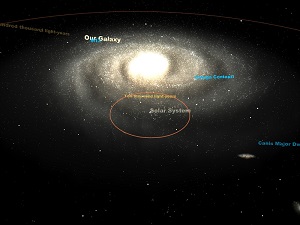 |
| A model of what our Galaxy would look like from the outside |
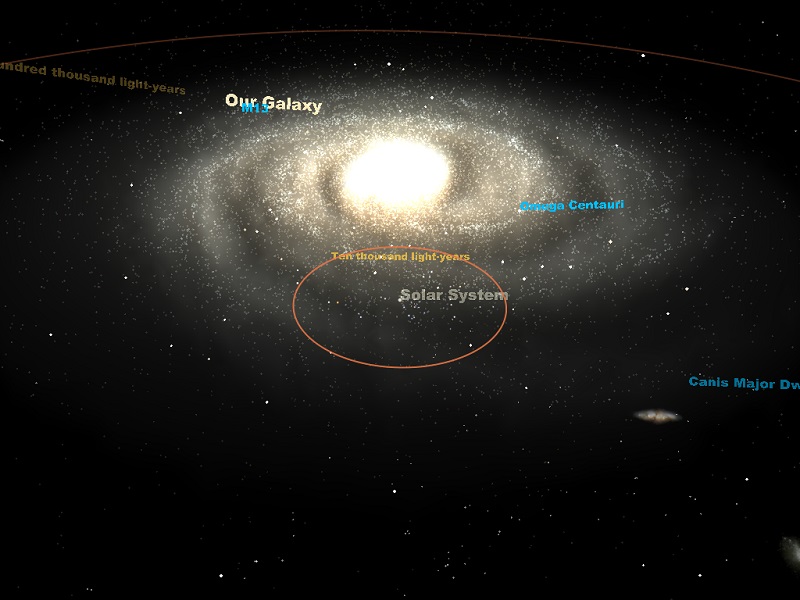
The Galaxy is believed to be a giant collection of approximately 200 billion stars
distributed in the shape of a disk with a 100,000 ly diameter.
You may have noticed that our Solar System is located rather far away from the center of the Galaxy.
Such a giant group of stars is generally called a galaxy.
Our Galaxy is an example of the barred spiral variety of galaxies.
When you look at the Galaxy from the side,
you will notice that the stars are distributed in a rather flat disk.
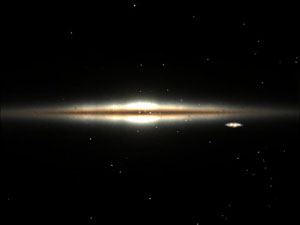 |
| The Galaxy as seen from the side |
The so-called "Milky Way" that we see from the Earth is how the stars of the Galaxy appear
when viewed from within the Galaxy itself.
Thus, our Galaxy is called "the Milky Way Galaxy."
As you continue zooming out, you will notice there are countless other galaxies like the Milky Way
in the Universe.
The "Local Group" is a group of galaxies containing the Milky Way and more than 30 other galaxies,
including Andromeda, the Large Magellanic Cloud, and Small Magellanic Cloud.
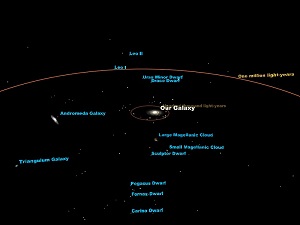 |
| The Local Group of Galaxies |
Continue zooming out, and the Milky Way turns into a point among many other points.
You have entered the realm of the galaxies.
Each point is no longer a star but a galaxy containing billions of stars.
You will notice a distinct structure,
with galaxies being crowded in some locations and distributed sparsely in others.
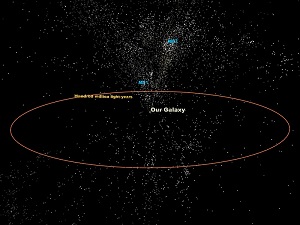 |
| The distribution of galaxies near the Milky Way |
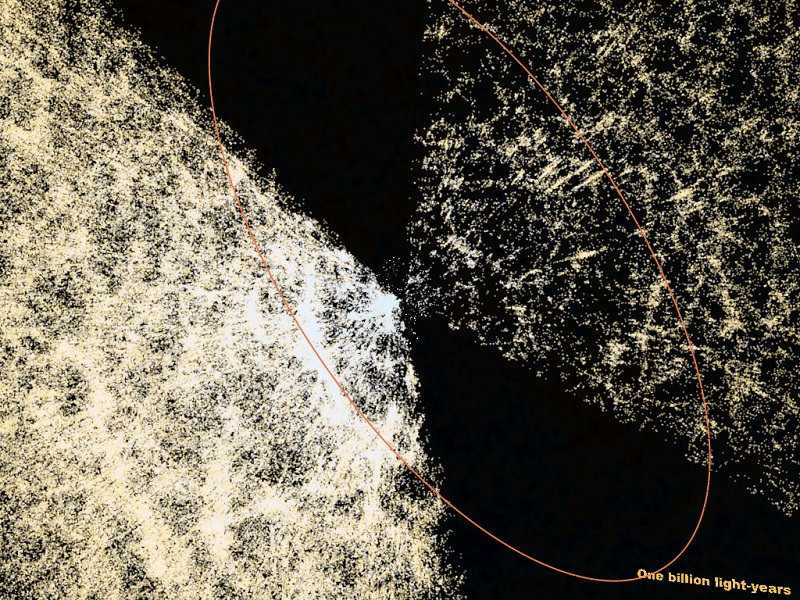
Beyond 1 billion light years from the Earth,
we see the distribution of galaxies observed by the Sloan Digital Sky Survey (SDSS).
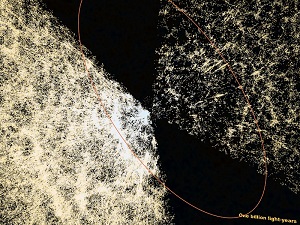 |
| The large scale structure of the Universe |
The image above shows fan-shaped wedges of galaxies,
but this shape is an artifact of the observations that have been conducted thus far.
Actually, the uncharted parts of the Universe must also be full of galaxies.
You have probably noticed that each fan-shaped slice has a series of galaxies making a mesh,
and that this mesh includes "voids," regions with almost no galaxies.
This structure is called "the large-scale structure of the Universe."
It is believed that this structure arose from extremely small "minute variations" in the very early Universe.
When you zoom out farther, you will find the distribution of quasars obtained by SDSS.
Beyond the quasars, an extended shell map of the Cosmic Microwave Background
as observed by the Planck satellite, as well as a circle delineating 13.8 billion light years, will come into view.
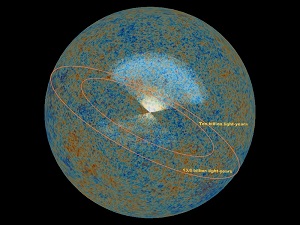 |
| The edge of the observable Universe |
The map of the Cosmic Microwave Background reflects temperature fluctuations in the early Universe,
namely about 400,000 years after the birth of the Universe.
Although the observed fluctuations are very small, on the order of parts per hundred thousand,
it is thought that they acted as the seeds giving rise to the large-scale structure of the Universe.
Because the Universe is thought to be about 13.8 billion years old,
the circle of 13.8 billion light years indicates the edge of the observable Universe
(in the sense that it is theoretically impossible for light or other information to have reached Earth
from beyond that range).
This concludes the outline of the hierarchical structure of the Universe
that has been obtained by astronomy to date.
So, let's return to Mitaka, Tokyo on the Earth.
You can go back there either by back tracking along the same way you came,
or selecting "Landing/Takeoff" - "Landing on Mitaka" from the menu bar will bring you back in an instant.
| Left-click & drag | Move the view point (space mode)
Change the view direction (planetarium mode) |
| Right-click & drag (back and forth), or wheeling | Zoom in/out (space mode)
Change the viewing angle (planetarium mode) |
| Point the mouse cursor on an object or its label |
Show the information on the object |
| Double click (left button) | Change the target (while pointing an object)
Move to the double-clicked point on an object's surface |
| Click "+" button in the upper-right corner | Run time forward |
| Click "-" button in the upper-right corner | Run time backward |
| Right-click in the upper-right corner | Open pop-up menu for handling time |
| Click "+" button in the lower-right corner | Zoom out |
| Click "-" button in the lower-right corner | Zoom in |
| Right-click in the lower-right corner | Open pop-up menu for scale selection |
| Push the wheel button | Land on or take off from a planet |
| Arrow | Move the view point (space mode)
Change the view direction (planetarium mode) |
| 1 + Arrow | Slue the view (space mode) |
| Page Up | Zoom in |
| Page Down | Zoom out |
| 4 | Run time forward |
| 3 | Run time backward |
| Z + 4 | Increase time increment (up to 100 years) |
| Z + 3 | Decrease time increment (down to 10 seconds) |
| S | Land on or take off from a planet |
| T | Move close to the currently selected target (space mode) |
| X | Open a menu or sub-menu on screen |
| Z | Close the menu or sub-menu |
| A | Show or hide labels |
| F | Show or hide frame rate per second |
| C | Capture a displayed image to save it in the file "capture.png" |
| ESC | End the program |
| ALT + ENTER | Switch to the full screen mode |
Enough for today! Have a nice space trip!
You have now mastered the basic features of Mitaka.
If you want to explore other features read the PDF manual and have fun!
|